Pen Tool
The pen tool is excellent for making very precise, editable selections. It's a more advanced tool that will take some practice to use well, but worth getting familiar with. Select it by clicking on the icon, or pressing P. Your cursor will look like the nib of a fountain pen.
- Using the white boat left of center again, click on the bow where the hull meets the water, and drag along the water line to the middle of the boat. You will see two handles extend from the initial click point—the anchor point—in a straight line. When you reach the middle of the hull, release the mouse button.
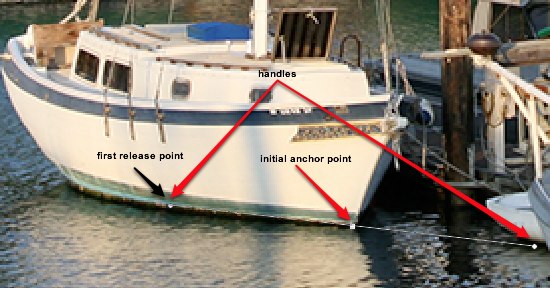
- Note that the handles remain. Now, click and hold on the stern (back) of the boat at the water line, and drag upward to about halfway up the backside of the boat. Do not release the mouse button yet.
- You will see that the initial handles have disappeared, and a new set shows extending from the second anchor point. Notice also that there is an arced line extending from the initial anchor point, into the water, and up to the second anchor point.
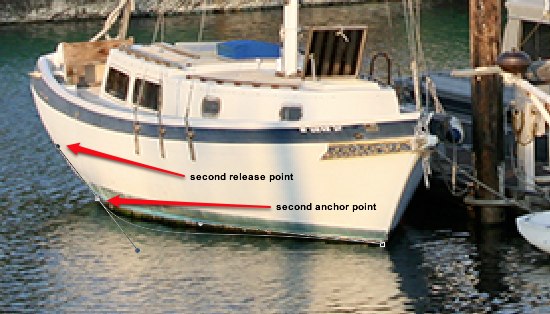
- If you move the handle under your cursor around the second anchor point, you will see that line bending like a rubber band. Don't worry if it's connected to the boat for the moment—we'll address that momentarily. Using the picture below, finish setting up the the anchor points around the hull of the boat, finally clicking on the initial anchor point to close the loop:
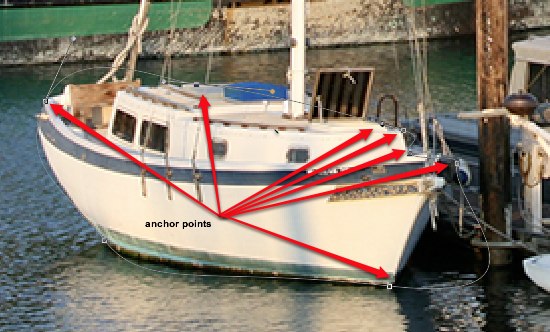
- The line around the boat probably looks similar to the pic above, only loosely connected to the boat.
- Note: If you wish to save that path for later use, double click on the words Work Path, give it a name, and press Enter. The path will now be saved with your document.
|
Parts of the Toolbar |